Wedding Cake Love

Stripes and ruffles are the driving design concepts for our wedding. With that being said, here are some of the cake designs I have been eyeing.

Stripes 

via
via
via

Ruffles

via
via
via

Different

via
via

via
I love them all!  Which one is your favorite?
5

Wedding Color Decision Time

After being engaged for four and a half months, I have finally settled on wedding colors. Being that I LOVE design and all things wedding planning (even before I was engaged), I surprisingly found the task of selecting wedding colors to be extremely difficult. I felt that I couldn't commit to anything. A special thanks to Pinterest and all the wedding blogs (Style Me Pretty, Southern Weddings Magazine, the Pretty Blog, Wedding Chicks, etc.) for making my decision extremely difficult with their never-ending array of beautiful wedding photos.

The winner is...
Peach & Gray


I pulled this page out of Brides Magazine several years ago and kept it in my "wedding file." I came across it two weeks ago and fell in love all over again. I think these colors will translate so nicely for a spring wedding!


Both photos via Style Me Pretty
I will still keep my predetermined 'stripes and ruffles' theme though (as seen in this inspiration post by Five Types of Happy). So excited to finally move forward!
3

Guest Posting at Daily Dose of Ramblings


Today, I'm guest posting on my dear friend Mandy's blog, Daily Dose of Ramblings. Mandy is on vacation so I am stepping in to share a great summer recipe. Head over to check it out!
0

Free home decor upgrades make me a happy girl!


Have you seen these beautifully dipped and dyed baskets showcased on the Martha Stewart site? It's crazy that a little bit of paint can make such a big impact.  Martha says just dip a basket into paint, let it dry and you're done.  Sounds easy enough.

via Martha Stewart
I recently stumbled across these other dip and dye projects.

via Homeroad 
via A Pair and A Spare
via Gracious Southern Living
After seeing the baskets above on Gracious Southern Living, I knew I could do this project in no time. I started with plain baskets that I purchased a long time ago from Home Goods. They were only $7.99 each. For that price, if I messed them up, it would be okay.


I pulled out an old gallon of white paint and went to town with a sponge brush. No tapping involved. I wanted quick and easy!


I let them dry for a little while...


And then popped them back into the shelve openings of my TV stand.


 It definitely added some pop and a more modern look. I love it!  Now my TV stand just needs an upgrade.  ;)
Linking up to... 


3

Thirft Store Treasure

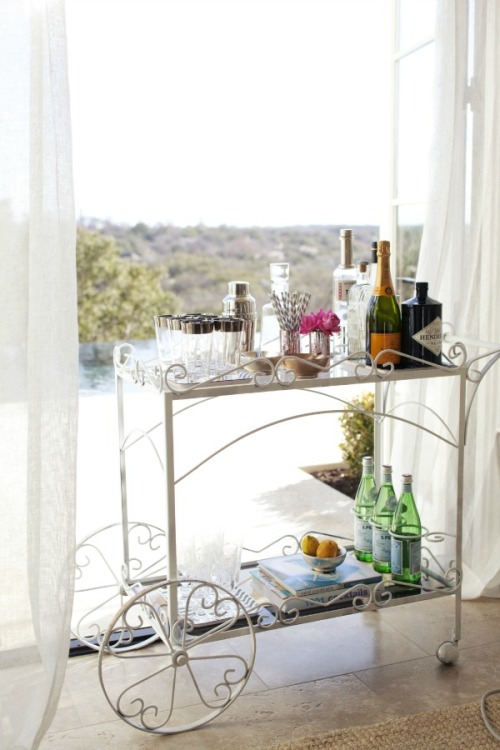
I often read posts where bloggers turn something they found at the thrift store into something incredible.  While I have found many great deals at thrift stores, I have never really hit the jackpot on something that could be quite a huge addition to my home. Well that changed today! I stumbled across this bar cart beauty at Goodwill and ended up paying $18 for it! 


I have seen so many bar carts in home interior magazines, design blogs and Pinterest. I'm so excited to turn my thrift store find into something glamorous! I think my cart even looks like the one below.

via Name 5 Things
Other inspiring bar carts...

via Emily Henderson
via Effortless Chic
via The Glitter Guide
via Material Girls

via Made By Girl
I figured this would be a great piece for parties, but also a good addition to my every day home. In the meantime, I think I will put it in my guest bedroom/office and use it for lovely storage as shown below.

via Real Simple
Cheers to great finds!
1

Big News on the Blog Front

It's official!  I have left blogspot.com in the dust and am now the happy owner of the domain name: simplysarahstyle.com!  The best part is that it is only costs $10 per year. If I would have know this, I would have made the jump to this domain a long time ago. A special thanks to Sarah at This Crazy Blessed Life for sharing the tutorial on how to purchase a domain name from Maggie at Midwestern Girl DIY.


What are you waiting for? Quick... Go set up your own before the name is taken.

One last thing... Did you know you also get free email accounts too? I am switching from simplysarahstyleblog@yahoo.com to sarah@simplysarahstyle.com. You reach me there now.

Happy Tuesday!
4

Bridesmaids Revealed

I am proud to say I have popped the question to ten beautiful girls!  Yes, I did say ten. I know it is rather large, but I love my girls.  Plus, I have been a bridesmaid eight times, so ten sounds about right!


I ordered personalized bridesmaid cards from the Trimmings Shop on Etsy. Jill, the designer, was a delight! She customized the cards with my preferred color scheme and even personalized the inside message. She sent me six different designs featuring my colors and allowed me to choose my favorite. What lovely customer service!

Once the package of cards arrived, I was even more impressed with her work. The paper quality of the cards and envelopes were so thick and nice. I was so happy with the way these turned out.


I popped the question to the majority of the girls in person, but had to mail some cards to my favorite out-of-town friends.


I topped each envelope with rock candy, a childhood favorite of mine. Plus, this resembles diamonds and crystals... perfect for asking a girl to get glammed up and be part of the biggest day of my life.


They have all accepted and I thrilled to get the wedding glam planning started!
2

My Ultimate Celebrity Crush


So I found this comic on Facebook today and add to share it with all my friends. It is in regards to one of Luke Bryan's latest hits, "Country Girl Shake It For Me." Everyone who knows me knows that I am a BIG Luke Bryan fan, if not his #1 fan. I like to brag saying that I listened to Luke even before his songs were on the radio... and that is indeed a fact! A friend of mine went to UGA and would go see Luke Bryan at hole-in-the-wall bars in Georgia all the time. Luke eventually released his first song "All my friends say..." and it totally reminded me of my college days.


By the time he landed his first song on the radio, I knew  many of his songs by heart. I went to see him for the first time at the In & Out bar in Nashville and FELL IN LOVE. He sure is one great performer, who knows how to work the crowd.


All did I know, less than a year later, I would have my face-to-face Luke encounter...


Through a great connection, my friends and I were introduced to Luke at a concert and got to hang out with him backstage after one of his shows.  BEST DAY OF MY LIFE (besides when Ben proposed). He even whipped out his phone to call Kenny Chesney while I was with him (wow!), because he was touring with him at the time.

Come to find out, I would even be featured in a video on his website. Okay, not necessary a music video, but a LBTV (Luke Bryan TV web episodes) video.  See below.  Isn't that one awesome facial I am making in the freeze frame? The camera eventually gets handled off to me and I start filming the LBTV video.


Well I love Luke and have seen him in concert a gazillion times. I have even had the privileged of meeting up with him again.

(Who is that creepy girl in the background? Not sure.)
Anyway I love this guy!  He is a great entertainer who plays great music. I would love to be in Nashville this week for CMA Music Fest so I could take my chances of running into him again. Hope everyone there is having a great time!
4

How to Frame a Stock Mirror

I think we all know how plain and ugly those big stock mirrors are that come when you purchase a new house. Well, sadly, I have two in my house. I have always hated them and have had plans to sex-them-up, but never did.  That all changed this weekend when I headed to Lowe's with a mission: buy moulding and supplies to frame the mirrors.

Since this was my first attempt at framing a mirror, I figured I should start with one mirror and see how it goes.  I started by selecting strips of moulding and some wooden medallions, all painted in white (the less work, the better). I had the hardware man cut the moulding strips based on my mirror measurements. I also asked the hardware man what type of adhesive I needed to buy. I heard there was something called mirror glue, but ended up with Liquid Nail, which was recommended by Lowe's staff. Side note: Good thing Ben was with me, because I would have left that store with a tube of Liquid Nail caulking and no caulking gun. (How was I supposed to know you needed one of those? I have never used caulking before.)

By the time I arrived at the checkout counter, I had the following in hand:
  • Strips of white moulding (cut based on my measurement specifications by the Lowe's staff)
  • 4 white, wooden medallions
  • One tube of Liquid Nail 
  • One caulking gun
Approximately total: $30


I was so eager to get started that I forgot to take a "before" picture. Here is one taken halfway through. Notice the hideously plain trim on the top and right sides of the mirror. At this point, I was admiring my work. I was so thrilled with the way things were going.


I am extremely pleased with the final product. I get so happy every time I go into my guest bathroom now! Overall, I think I spent more time at Lowe's than I did adhering the DIY frame to the mirror. That is always good news. Shopping > Everything else! 


Now I am looking forwarding to transforming my master bathroom next!


7
Back to Top